import cv2
import numpy as np
import math
class KalmanTracker:
def __init__(self):
# 상태 벡터: [x, y, vx, vy]
self.kalman = cv2.KalmanFilter(4, 2)
# 측정 행렬 (x, y 위치만 측정)
self.kalman.measurementMatrix = np.array([
[1, 0, 0, 0],
[0, 1, 0, 0]], dtype=np.float32)
# 상태 전이 행렬
self.kalman.transitionMatrix = np.array([
[1, 0, 0.1, 0],
[0, 1, 0, 0.1],
[0, 0, 1, 0],
[0, 0, 0, 1]], dtype=np.float32)
# 프로세스 노이즈 공분산 행렬
self.kalman.processNoiseCov = np.array([
[1e-4, 0, 0, 0],
[0, 1e-4, 0, 0],
[0, 0, 1e-2, 0],
[0, 0, 0, 1e-2]], dtype=np.float32) * 0.1
# 측정 노이즈 공분산 행렬
self.kalman.measurementNoiseCov = np.array([
[1e-1, 0],
[0, 1e-1]], dtype=np.float32) * 0.1
# 사후 오차 공분산 행렬 초기화
self.kalman.errorCovPost = np.array([
[1, 0, 0, 0],
[0, 1, 0, 0],
[0, 0, 1, 0],
[0, 0, 0, 1]], dtype=np.float32) * 1
self.initialized = False
self.last_velocity = np.array([0., 0.])
def predict_only(self):
prediction = self.kalman.predict()
return prediction[:2].flatten()
def update(self, measurement, paused=False):
if not self.initialized:
# 초기 상태 설정
self.kalman.statePost = np.array([
[measurement[0]],
[measurement[1]],
[0],
[0]], dtype=np.float32)
self.initialized = True
return measurement
# 예측 단계는 항상 수행
prediction = self.kalman.predict()
if not paused:
# 일시정지가 아닐 때만 측정값 업데이트
measurement = np.array([[measurement[0]], [measurement[1]]], dtype=np.float32)
estimated = self.kalman.correct(measurement)
# 현재 속도 저장
self.last_velocity = estimated[2:4].flatten()
else:
# 일시정지일 때는 예측값만 사용
estimated = prediction
return estimated[:2].flatten()
# 창 크기 및 기본 설정
width, height = 600, 600
center = (300, 300)
road_radius = 200
ball_radius = 20
# 칼만 필터 초기화
tracker = KalmanTracker()
# 공의 이동을 위한 변수
angle = 0.0
angle_speed = 1.0
direction = 1
# 실제 위치와 예측 위치를 저장할 리스트
actual_positions = []
estimated_positions = []
# 일시정지 상태 변수
paused = False
last_position = None
while True:
# 검은색 배경 이미지 생성
img = np.zeros((height, width, 3), dtype=np.uint8)
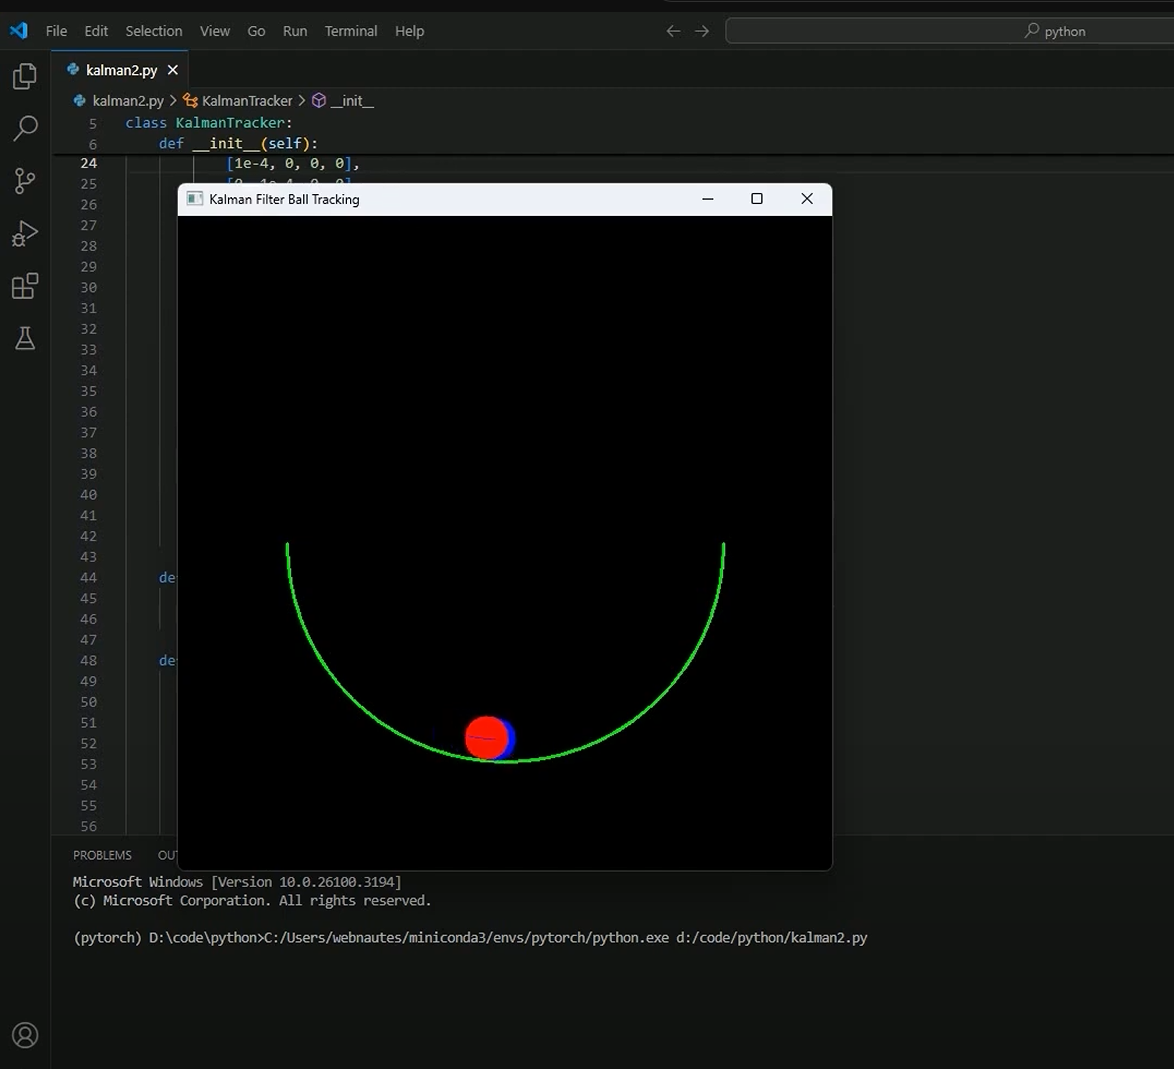
# 초록색 도로(반원) 그리기
cv2.ellipse(img, center, (road_radius, road_radius), 0, 0, 180, (0, 255, 0), 2)
# 현재 각도를 라디안으로 변환
if not paused:
theta = math.radians(angle)
# 도로 위의 접촉점 계산
contact_x = center[0] + road_radius * math.cos(theta)
contact_y = center[1] + road_radius * math.sin(theta)
# 공의 실제 중심 위치 계산
ball_center_x = int(contact_x - ball_radius * math.cos(theta))
ball_center_y = int(contact_y - ball_radius * math.sin(theta))
last_position = (ball_center_x, ball_center_y)
else:
ball_center_x, ball_center_y = last_position
# 칼만 필터 업데이트
measurement = np.array([ball_center_x, ball_center_y])
estimated = tracker.update(measurement, paused)
# 실제 위치(파란색)와 예측 위치(빨간색) 그리기
cv2.circle(img, (ball_center_x, ball_center_y), ball_radius, (255, 0, 0), -1) # 실제 위치 (파란색)
cv2.circle(img, (int(estimated[0]), int(estimated[1])), ball_radius, (0, 0, 255), -1) # 예측 위치 (빨간색)
# 일시정지 상태 표시
if paused:
cv2.putText(img, "BALL PAUSED", (10, 30), cv2.FONT_HERSHEY_SIMPLEX, 1, (255, 255, 255), 2)
# 궤적 저장 및 그리기
actual_positions.append((ball_center_x, ball_center_y))
estimated_positions.append((int(estimated[0]), int(estimated[1])))
# 최근 10개의 위치만 표시
if len(actual_positions) > 10:
actual_positions.pop(0)
estimated_positions.pop(0)
# 궤적 그리기
for i in range(1, len(actual_positions)):
# 실제 궤적 (파란색)
cv2.line(img, actual_positions[i-1], actual_positions[i], (255, 0, 0), 1)
# 예측 궤적 (빨간색)
cv2.line(img, estimated_positions[i-1], estimated_positions[i], (0, 0, 255), 1)
if not paused:
# 각도 업데이트
angle += angle_speed * direction
if angle >= 180:
angle = 180
direction = -1
elif angle <= 0:
angle = 0
direction = 1
# 결과 이미지 출력
cv2.imshow("Kalman Filter Ball Tracking", img)
# 키 입력 처리
key = cv2.waitKey(30) & 0xFF
if key == 27: # ESC
break
elif key == 32: # Space bar
paused = not paused # 일시정지 상태 토글
cv2.destroyAllWindows() |
Member discussion